We are in the season of young ginger. Tender, mildly spicy
and gorgeous to look at, the creamy hands are making their way to Asian
markets. I saw super beautiful ones in Oakland Chinatown last week but
refrained from buying because I was bound for the banh mi photo shoot. I said
to myself, “The next time you see young ginger, buy it to pickle.” Yesterday I
surprisingly found the ginger at my local hippie-dippy market. It was
organically grown, from Hawaii. The cashier had no idea what it was.
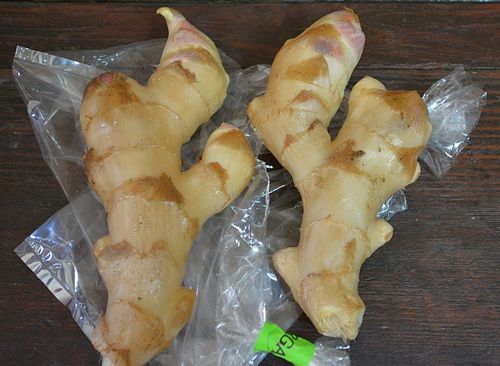
In Asian vernacular, there’s young and old ginger. The young
stuff has paper bits of translucent skin whereas the mature ginger is covered
by tan, dry skin. Most of the year, we’re all cooking with old ginger, whose
bite punches up many foods and warms our bodies. Young ginger can be eaten raw
– I’ve had Thai fermented sausage with raw ginger, which complements the
sausage flavor and functions as an antibacterial.
But there’s only so much young ginger I can eat. My main
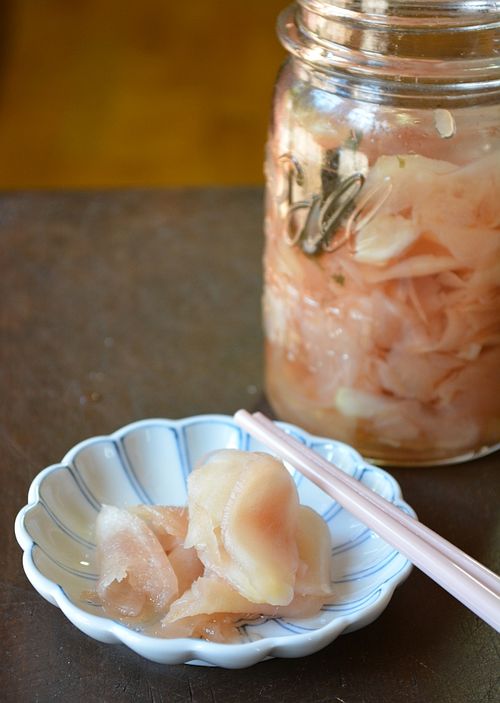
method of using it is by pickling it Japanese style for what most of us recognize as sushi ginger (gari in Japanese). I enjoy it with sushi (obvious) but also mixed into sushi rice and stuffed into fried tofu pockets. It's a terrific side to grilled oily fish such as salmon or mackerel.
 There are fabulous recipes
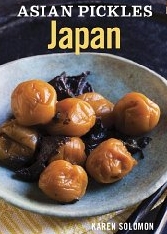
in cookbooks by Elizabeth Andoh and Hiroko Shimbo but this time around I used Karen
Solomon’s recipe from Asian Pickles:
Japan. It’s currently sold as a $2.99 ebook and is part of her upcoming
book called – you guessed it, Asian
Pickles – which will be released in its entirety in Spring 2014. Publishing
a book in parts is an interesting way to offer readers the option to buy the
chapter that they’re interested in.
I got the enhanced iBooks version that came
with audio pronunciations of the recipe titles and ingredients, which is
helpful if you’re not versed in Japanese food terms. Otherwise, the regular
ebook of Asian Pickles: Japan sold online
will be fine.
Karen lived in the Japan in the 1990s and writes with an infectious
verve. I bought two hands of ginger, about 1.5 times the amount she called for
so I simply did the math for the recipe below. Some things to note:
- If you can’t find young ginger, use regular old
ginger but peel it. During the blanching, let the ginger sit in the hot water
for 45 to 60 seconds instead of the 20 seconds called for below. - Homemade pickled ginger may turn a blushing pink
but not the torrid pink of storebought pickled ginger, which may have a little
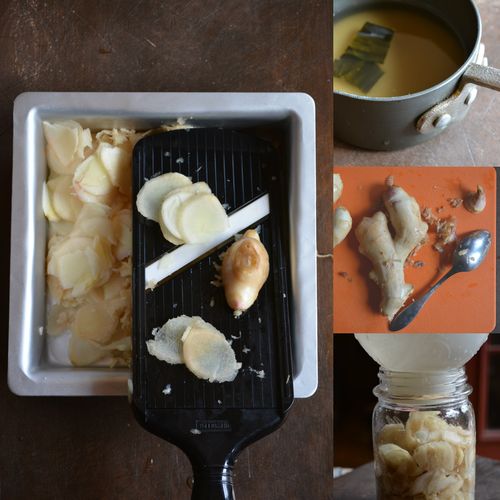
help from dye. - Use a mandoline or super sharp knife to cut the
ginger. You need very thin pieces. I put my mandoline in a square baking pan
(see photo above) to keep it in place and safely use it. - Don’t throw away the pickling brine. It’s
delicious. - The dried kelp is my addition, a little umami
trick I learned from Japanese food authority Elizabeth Andoh.
Karen’s recipes are fun, written without the burden of
bowing to tradition. As a non-native, she gives readers an undaunted take at
Asian foodways, opening the door as if to say, “What have you been waiting for?
Don’t be silly. Just dive in. I have.” You can’t lose with a $2.99 investment.
Along with the Japan e-booklet, there’s also an Indian, Korean, and Chinese
one.
Recipe
Japanese Pickled
Ginger
Gari
Yield: About 1 ½ cups
Ingredients
- 9 to 10 ounces (270–300 g) young ginger
- 6 tablespoons plus 1 ½ tablespoons sugar
- 1 ½ tablespoons kosher salt
- 9 tablespoons unseasoned Japanese rice vinegar
- 2 squares of dried kombu (kelp), each about the
size of your thumbnail (optional)
Instructions
- Use an inverted spoon to scrape off the thin,
paper bits from the ginger. Use a mandoline or very sharp knife to cut the
ginger across the grain into super thin pieces. They should be nearly
see-through. - Toss the ginger with the 1 ½ tablespoons of
sugar and salt. Set aside for 30 minutes to reduce its harshness. - Meanwhile, partially fill a small saucepan with
water. Ready a fine-mesh strainer and 2-cup (.5 liter) glass jar. In another
saucepan, combine the remaining 6 tablespoons sugar, vinega,r and kombu (if
using). Set this stuff aside near the stove. - About 10 minutes before the ginger finishes
mellowing out, start the water pot going on the stove. When the ginger is done,
add it all to the boiling water, stir and blanch for 20 seconds to further reduce
the harshness. Drain in the mesh strainer but don’t rinse. Shake a few times to
expel water, then put into the glass container. - Bring the mixture of sugar and vinegar to a
boil, give things a stir to ensure the sugar has dissolved. Then pour into the
jar of ginger. Push down with chopsticks or a spoon to submerge. Cool, uncovered,
then cap and refrigerate. Depending on the ginger, it may be ready to eat in 1
to 3 days. Taste and see. Store refrigerated for months.
Adapted from Karen Solomon’s Asian
Pickles: Japan (ebook edition, Ten Speed Press, 2012)




Suzette says
Oh, this is awesome! I went out for sushi the other day and felt that I needed way more ginger to munch on! Thanks!
Ram Jha says
great knowledge about indian masala...
thanks for share...
Lauren says
Do you sterilize your jar in any special way before hand?
Claudia Reali says
Mine haven't turned pink and the flavor is too strong.
Maybe I should have cut thinner slices? Or boiled them longer?
I think it was pretty fresh ginger.
Thanks!
Andrea Nguyen says
Nope, because I stick the jar in the fridge. No sterilization needed.
Andrea Nguyen says
Both, Claudia. Since it's already made, just keep them longer before you eat the ginger. It mellows over time.
Zzbyrd says
What can you make with the brine?