Raise your hand if you’re had a hard time buying bean sprouts. At regular supermarkets, they’re often a challenge to find in the produce department, and not super fresh, having been packaged and shipped from somewhere far away. Even at my 1970s-era health food store where there are locally-grown bean sprouts, they’re often borderline wimpy – not perky and crisp as they ought to be. The fresher ones tend to come from Asian markets where there’s a fast turnaround but how often can you get to an Asian market? Face it, bean sprouts sold at markets can be pricey and sad for their price.
“Grow bean sprouts,” my friend My Uyen said. “They’re fragrant and flavorful.” We were in Saigon eating at a modern, cool pho shop. I thought she was joking. My Uyen makes her own lip balm from the dregs from making coconut milk; she’s also a banking executive, owns a café, and co-owns a clothing boutique. I raised my eyebrows and looked at her with skepticism. “It’s easy. Really,” she reassured me.
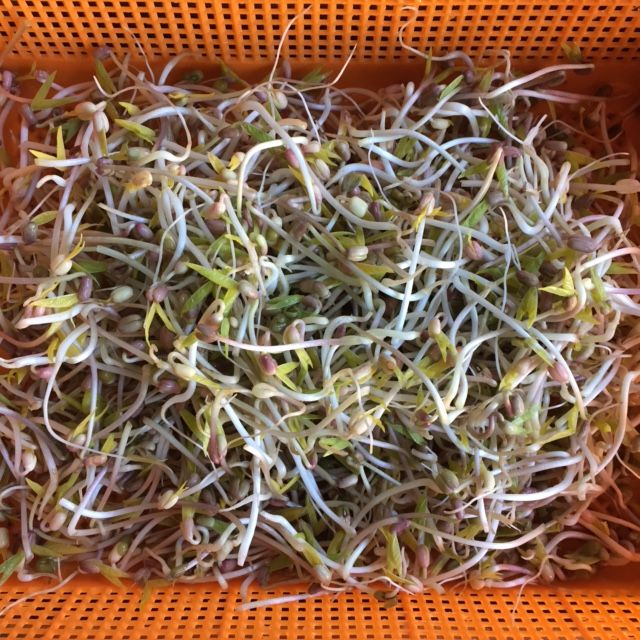
Fine. Back at home in California I noodled around on the internet for advice. Most of the information in various blog posts and articles was for growing little sprouts in jars. I chose to instead grow in a small colander. On my first attempt at growing mung bean sprouts in November 2015, this is what I got:
They’re squiggly, not delicate and long. I disappointingly dumped them because I’d only invested about 3 tablespoons of organic mung beans purchased from Whole Food. Growing bean sprouts got put on the back burner while I was busy with making The Pho Cookbook and editing Unforgettable (just released and available on Amazon!)
After picking through sad bean sprouts for a pho lunch a couple weeks ago, I decided to try growing them again. This time I did more research: I watched YouTube videos of Asian people growing bean sprouts. Theirs were long and dense, not worm-like like my first attempt.
In “Cheap Easy Method”, a casual fellow grew his in a rectangular plastic colander. With rinsing/watering the mung beans a few times daily, he got sprouts in five or six days. The shape of his colander was conducive to the sprouts growing tall. They had something to grip on, I figured.
Then there was the lady who grew hers in a giant plastic colander in the dishwasher. For her lazy method, she constructed multiple layers of soaked mung bean sprouts arrayed between damp bar towels, which naturally got gross from the beans’ coloring. She put the entire thing in her dishwasher, which she normally used for storage – like many Asian people, including my mom. She promised sprouts in 3 days.
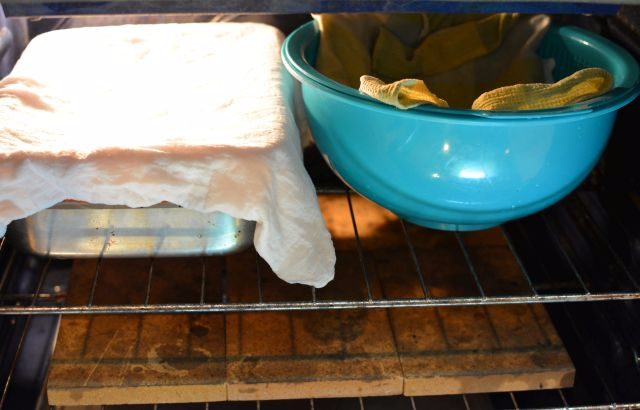
“I am not giving up our dishwasher for 3 days,” my husband declared when I showed him the video. “The interior of the dishwasher isn’t different than that of the oven. Put yours in the oven and turn the light on.”
That’s what I did and have this to report thus far: It’s dead simple to grown mung beans but you need to keep a few things in mind.
Some people are concerned about bacteria in sprouts. Make sure your equipment is clean. Use water you’d drink to rinse, soak, and water the beans. Keep critters away from your little farm. You’re in greater control of sprouts grown at home than you are of commercially grown ones. You’re also small batch farming, which lowers your risk of contamination. Review the sprout safety information at gov.
Buy good beans. I sourced organic ones from Whole Foods. They were about $2.50 a pound. I bought about ⅓ pound, enough for several rounds.
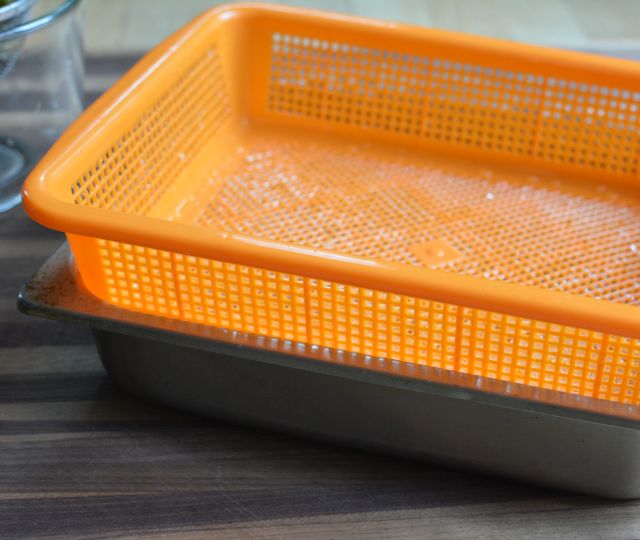
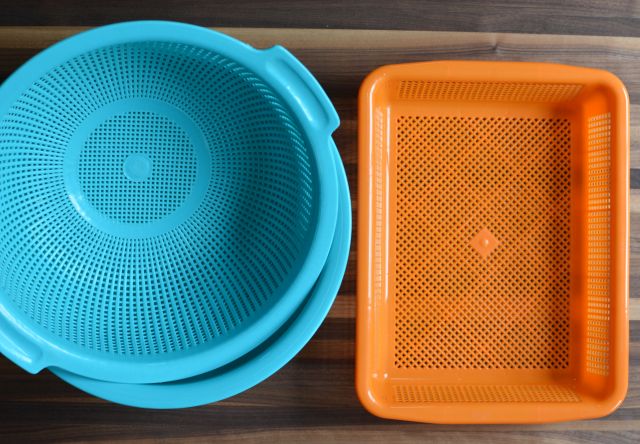
Choose something porous to grow in. My rectangular and round strainers/colander came from an Asian houseware shop (Kamei on Clement in San Francisco) though you can find them at Asian markets too. A metal one like this or this would be fine, too. You want something with a wide flat bottom and holes all around. My plastic orange one had an interior roughly the size of an 8.5 x 11-inch, regular piece of paper. The teal round one is about 14-inches wide at the top. If you can, chose rectangular over round because the sprouts can spread out evenly without crowding.
Find something to hold the strainer and catch water, such as a baking pan or bowl. If the colander comes with a bowl as a set, use them.
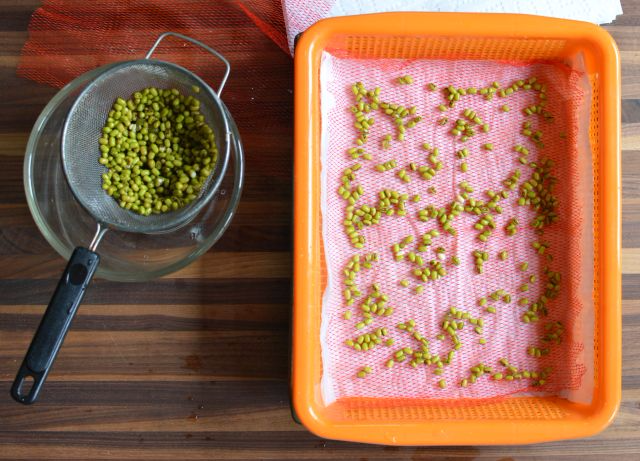
Rinse then soak ¼ to ⅓ cup of dried mung beans in enough water to cover 1 inch. Let it sit, uncovered, at room temperature for 6 hours, or even overnight.
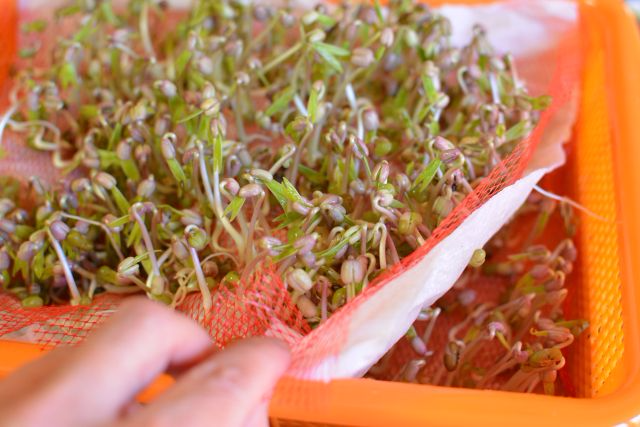
Line the strainer with 2 layers of damp paper towel. The beans like moisture. If available, add a piece of plastic netting recycled from a bag of produce (onions or oranges, for example) to raise the beans a bit and give them something more to cling on to and stand upright. They’ll eventually poke their roots through the paper towel to stand up but you can give them an assist.
Scatter the soaked beans on top. Though you don’t have to do this, you can add another layer of paper towel on top of the beans to keep them in place and to add extra moisture.
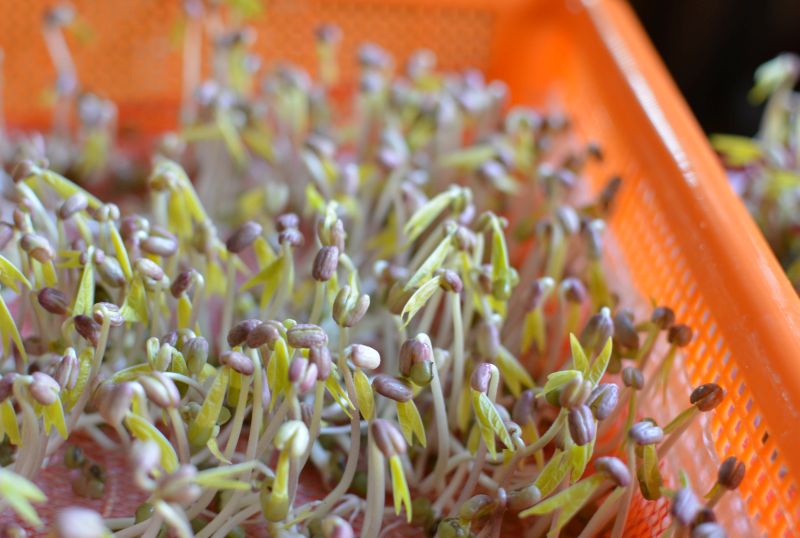
Cover the entire farm with a dishtowel, or multiple layers of cloth. The color of the cloth impacts the growth because it let light in. I chose white and light colored dishtowels, and the beans took on a pink color and sprouted light green leaves. They got a slightly bitter flavor so I covered them with a dark towel to arrest that progression.
Set the mung bean farm in a dark spot or make sure it’s in the dark. I initially slid mine into the oven and for a couple of days, turned the light. The result were colorful sprouts with pinkish tips and green leaves. The flavor was great, if not more alive than I expected. However, you may want sprouts like what you get at the store. If you used a dark covering for the farm then you can set it anywhere because little light is coming in.
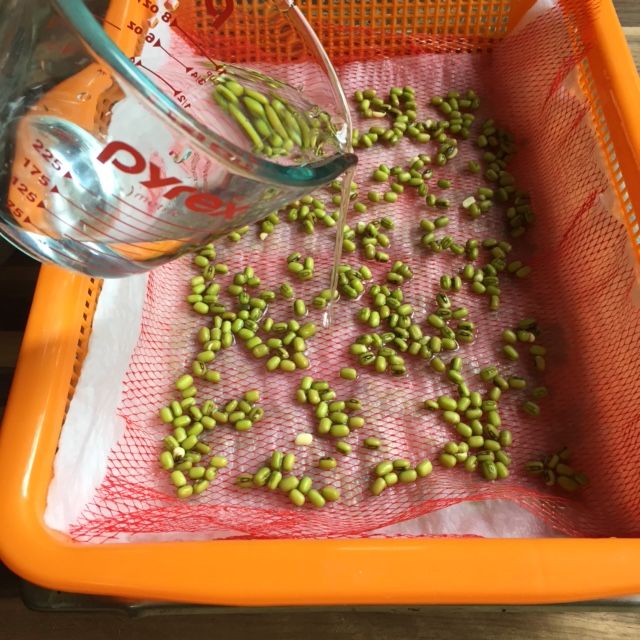
Each day, water the mung bean babies 2 or 3 times. Use the gentle sprayer from the kitchen sink faucet or pour on the water from a measuring cup. You’ll watch them develop each time you peek. After 5 or 6 days, you’ll have bean sprouts.
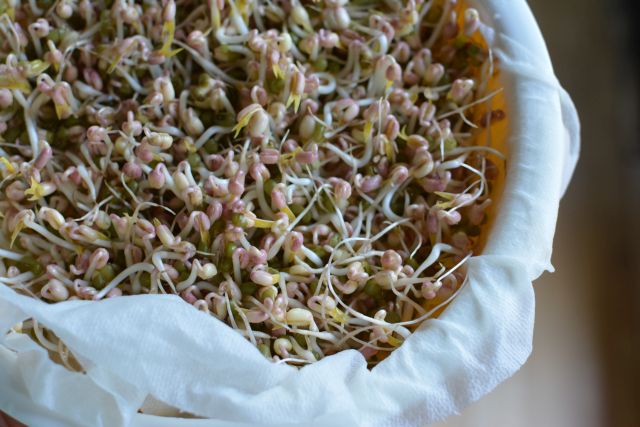
Rinse and store the bean sprouts. The green husk usually falls off as you transfer the sprouts. You can cut the tails off with scissors or keep them for an artful, natural look. I kept mine in a recycled plastic produce container.
Homegrown vs. Purchased Bean Sprouts
Is it worth growing your own? I think so. It’s a low-key and passive project. It’s also fun to see your mung beanie babies grow! Do note the following:
- Homegrown bean sprouts are skinnier than the ones sold at most grocery stores. The ones you grow yourself are more like the organic ones at the supermarket.
- The ones I grew taste life-giving. I didn’t realize that bean sprouts could have such good flavor until I grew them myself.
- If you’re concerned about eating raw sprouts, enjoy them in cooked form. For example, blanch them for pho.
I’ve eaten store bought bean sprouts most of my life and the homegrown ones are swell. They’re fun to cultivate, too.
After batch two, I watched a raw foods guy on YouTube who I guess is Filipino because he calls mung beans mongo. He did a neat trick with a black t-shirt: he used a rubber band to bunch up the neck to create a stretchy cloak for the mung bean farm.
I’ve borrowed his idea for a third batch and covered it with a dark towel. It’s sitting on our dining room floor. Stay tuned to see if there’s a difference.
Pho Cookbook updates!
I did four (4) book events this week. Highlights included going to Lucas Films where I got to take a photo with R2D2 and C-3PO. I also met Amelia (above holding the book), a third grader who wrote me a thank you note in 2015 for donating books to her school’s fundraiser; in that note two years ago, she wanted me to write about noodles. If you shop at Whole Foods in San Francisco, you’ll see my ingredient picks for pho; they’re totally on board with spotlighting Viet cooking. And, Costco is carrying the book!
One of the toughest professional cookbook reviewers around test drove the book; Paula Forbes gave the book very high marks in her review at Lucky Peach. I’m equally honored when people post photos of their homemade pho (the chicken bowl is from Debbie Q.) and write kind Pho cookbook reviews on Amazon and elsewhere.
Next up is Seattle. Join me for the talk and signing at Book Larder. I’ll be giving the 4-1-1 on pho on April 11; RSVP for the free event. Even if you’re not in Seattle, you can catch me in a Facebook Live session with Chefsteps on April 10 at noon PST.




Fern says
Most of the bean sprouts one purchases does not contain the husks, yet none of the videos I have watched show an effective way of accomplishing this.Is there a way to do this without damaging the sprouts?
Andrea Nguyen says
Very true but I have no idea how they get them off the sprouts. Maybe they're are washed with a sprayer to knock them off? I did not mind the husk because they added some texture. If you find out, let us all know! Thanks for asking. Sorry that I didn't have an answer.
Justme says
"The green husk usually falls off as you transfer the sprouts. You can cut the tails off with scissors or keep them for an artful, natural look. I kept mine in a recycled plastic produce container. "
This is directly from this post.
David says
Salad spinner gets all the husk out ^_-
Wendy says
I'm growing mine in a dollar store salad spinner. The strainer floats just a few inches away from the container so water can drain properly and I have it fully covered up with a black t-shirt. Seems to be growing well. I am on day five now, but the bean is still very prominent. Might have to wait an extra day. I nibbled on one or two that fell out from the strainer the flavor is very good.
Andrea Nguyen says
That's so cool, Wendy. Thanks for the salad spinner tip. Hope you get the sprouts sooner than later!
Martín Cornejo-Saavedra says
Thanks for your help
Andrea Nguyen says
You're welcome!
Claire says
A while ago I read online, but can't find it now ofc, that to get beansprouts to grow straight with thick stems you place a weighted lid onto them. This causes them to force themselves vertically rather than squiggly. May also require that they're in a narrowish container. I assume that the weight isn't heavy.
Andrea Nguyen says
Maybe that's where the cloth comes in? Thanks for contributing the information!
Lois says
I grow mine with weight. They are squiggly.
Hitesh says
It's looking like growing nung beans 4m d same.
I also tried this so many times. Am using still container with lead. Put sprouted beans(1 day after soaking) in thin wet cotton , put these inside metal container , cover with lead. Rinse well 2-3 times per day by drinking water(rinse in dark room) you will get big fat sprouts with 2 yellowish leafs in 6 days.
Andrea Nguyen says
Hello Hitesh. Thank you for contributing your tips. Are you using a metal container -- like it's made from stainless steel? I imagine it's a deep tray, like a roasting pan that looks like this:
https://www.amazon.com/Chicago-Metallic-Professional-Non-Stick-13-Inch/dp/B003YKGRG4/ref=sr_1_13?keywords=roasting+pan&qid=1554418968&s=gateway&sr=8-13
The rack may help the sprouts stand up! Anyway, thank you so much!
Tanya J Briggs says
I am replying to this a year or so late but felt I could add to this discussion. I have been growing mung sprouts every way for 40 + years. NOW I only grow in a simple deep clay pot...about 8 inches deep. I cut a piece of plastic needlework canvas to fit bottom. I put soaked seeds (about 1/3 cup unsoaked) into pot. Place another plastic round on top of seeds. then I put a layer of glass flattish decorative stones (dish-washable) in a mesh produce bag on top. Then I used a clay saucer on top and bottom. Rinse 2 times a day. You will have beautiful thick LONG sprouts and the tails will stick into the plastic canvas...and you can then cut a lot of the tails off when harvesting in one swipe of knife. When they are pressing the clay lid up...I no longer use weights. By then they are trying to push leaves and the hulls are easy to remove with a soak in sink water...and they will float or sink away. Remember to dry well before storing in bags.
Andrea Nguyen says
WOW, Tanya. Thank you for such detailed information. This is incredibly helpful and makes total sense. You're a gem to do this.